This post is a Lacquered Furniture DIY – Six Simple Steps.
My color loving friends, I’ve got a solution for you if you look around your room and see all dark brown furniture.
I love wood furniture. I love beautiful brown finished furniture. But, I love it mixed with cheerful colorful lacquered furniture the most.
I have recently completed two pieces of lacquered furniture and I’m over the moon excited with A) how Easy a DIY lacquering furniture proved to be, and B) how beautifully the lacquered furniture turned out.
Here’s where we started with both pieces:
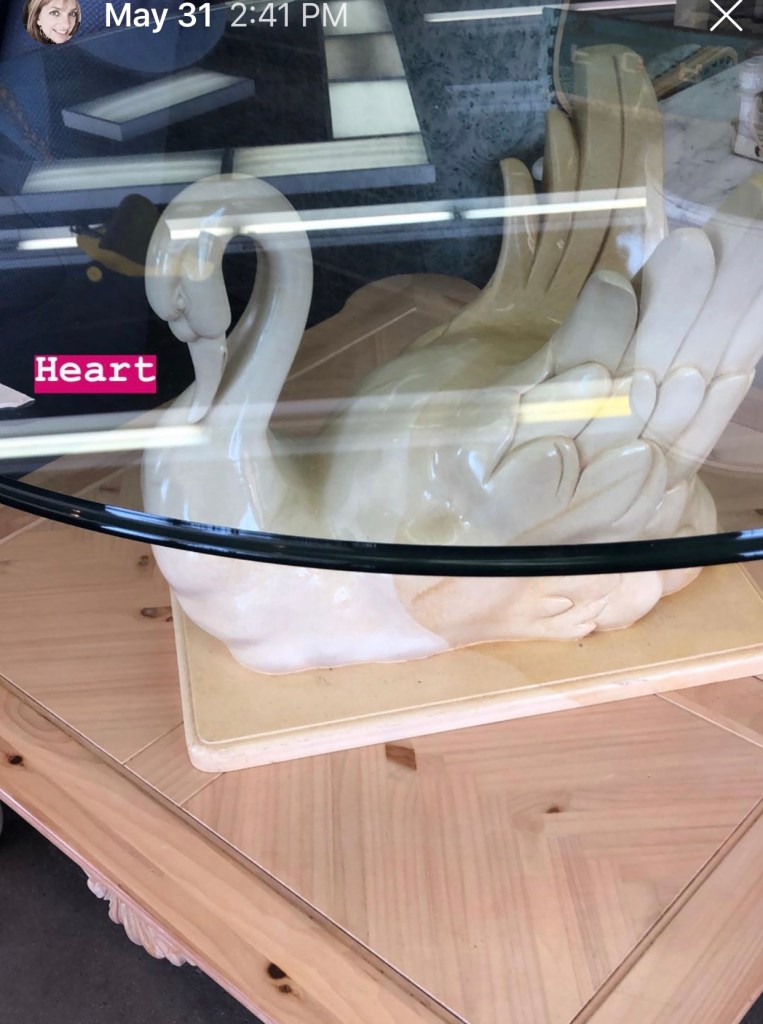
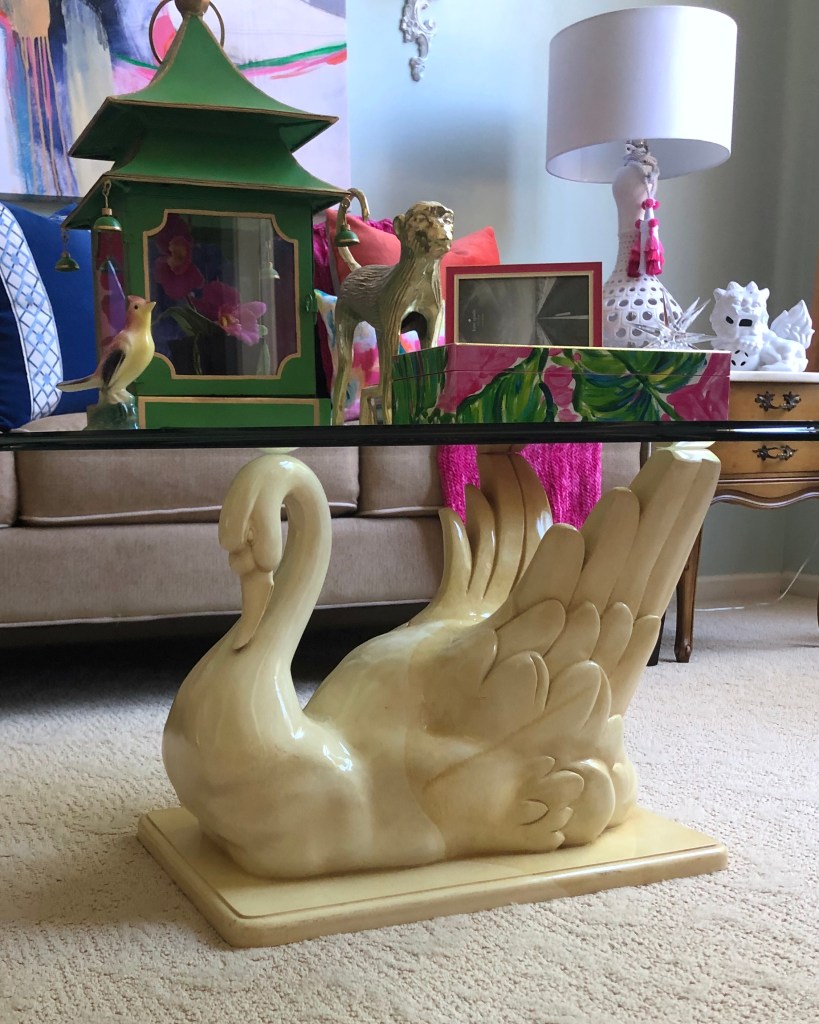
Mid-Century Swan Table 
The Cheetah Print Chair in the French Office
Southern Nell’s Gracious Living uses affiliate links. Read more HERE.sd
I encourage you to check out this recent post where I used Lacquer Spray Paint: Spray Paint a Ginger Jar. Spray paint was also used in this DIY: Marble Shelving Unit ~ Budget Friendly and Easy DIY Makeover.
Lacquered Furniture DIY
The pieces I gave a complete lacquer makeover are the above pictured vintage cocktail table, and vintage side chair.
Six Simple Steps to a Lacquered Furniture Piece:
- Thoroughly clean your piece. I used “holy cow” degreaser.
- Lightly sand the piece with a medium grit sandpaper- I used 80 grit
- Wipe away all the dust particles with a slightly damp cloth or tack cloth
- IF NECESSARY tape off the area you wish to keep paint free.
- Begin with a light coat of Lacquer or High Gloss Spray Paint – FOLLOW the DIRECTIONS on the SPRAY can. They can differ depending on the brand. TYPICALLY, I keep the nozzle about 5-6 inches from the item and apply dusting type strokes. NOTE: 2-3 Light coats (with light sanding between) will give you the best outcome. IF you get a run, wait for the paint to dry and lightly sand it away. DON’T try to correct it while wet. WAITING TIME IS between 24-48 hours depending on the brand. DON’T TRY to Rush the time between coats.
- Apply a clear lacquer coat for a protection and high gloss. This step is completely up to the individual. If you will be using the furniture piece often you should add the protective coat.
Here is a supply list for lacquering furniture:
- soap and water – or degreaser if necessary
- fine grit sandpaper (400)
- tack cloth
- lacquer spray paint
- painter’s tape
- plastic tarp/bag
- spray tent – not necessary but oh so helpful
- disposable respirator mask
Lacquering a Vintage Cocktail Table
The first lacquered furniture DIY, is a Mid-Century Swan Coffee Table. If you follow me on Instagram (link here), you know I found this bird at an Estate Sale. It was love at first sight. I debated keeping her creamy finish. I lived with the piece in the living room, fully styled, for a week before I went forward with the lacquer spray paint plan. (Time had yellowed the original finish.)
Steps For Lacquering A Furniture Piece:
Step One: Wash the piece with degreaser. You would proceed to step two and step three a light sanding and dusting if needed. This piece did not need those steps. This piece had no need for taping off, step four, so we moved to on to the fun stuff (choosing a great piece can save steps and time).
Step Five: You’re ready for the fun. Read the directions on the lacquer spray paint you chose. All lacquer requires a well ventilated area. I also splurge for a spray mask, just to be on the safe side. There will be over-spray, so if you don’t own a spray tent, you can make one out of card board or old sheets. Or, in my case, I had a beautiful day, so I set the piece on saw horses above a tarp and didn’t need a tent.
One important tip for you: I always start spray painting furniture from the top and work down, trying to keep a wet edge. Otherwise, you will have over spray, and will not get as smooth a finish. Most cans will recommend spraying from 5-6 inches away with a light coat.

Important Tip #2: WAIT until the piece dries completely before sanding any runs!! Runs are almost inevitable, so don’t panic when you see one. You can correct it as long as you wait until it is dry. This piece took 3 coats of spray lacquer paint with any necessary light sanding between coats, to achieve a beautiful flawless finish.

Step Six: Applying a top lacquer coat: I received the look I wanted without a lacquer top coat finish. You will determine if you have a high usage piece that will need more protection or if you want more gloss. I’m so glad I lacquered this piece!
Lacquered Spray Paint – The Swan

The old dull finish has been restored to a beautiful white sleek lacquered finish that this beautiful vintage swan cocktail table deserves! She looks great from every angle.


Simple Steps to a Beautiful Lacquered Furniture Piece — Number Two
The second lacquered furniture piece DIY featured in this post is an accent chair. Remember how it looked?
The only regret I have where this chair is concerned is not purchasing the second of the pair! At the time I wanted it for my office and only needed one. But, it’s far too sassy to be sequestered in the upstairs office seen only by me. So I relocated it to the Living Room.
Simple Six Step Guide to Lacquer Painted Furniture – again.
Steps One, Two, and Three for the chair were the same as the cocktail table.
Step Four: Because removing the fabric from the base of the chair was more complicated than I wanted to attempt, I proceeded with a painstaking process to tape off the fabric. First, I taped every area where the fabric meets the wood on the chair.

Then, I taped a plastic tarp or bag over the top of the first tape I had applied. This worked perfectly for me, and kept paint off the fabulous cheetah fabric.
Important Tip 3: The taping off step is the most tedious and time consuming, but completely necessary step in the process.

Next you will complete Step 5 and Step 6 of the listed steps above, just as on the Vintage Swan Cocktail Table, being careful to sand between the coats of paint. The high gloss lacquer spray paint I used did not require Step 6, top coat, for the chair.
Lacquered Spray Painted Furniture – The Cheetah Chair

I realize PINK lacquer and cheetah print could be a little much for some of you. It’s okay, to use white lacquer and gray velvet. The process will work.
Here’s my analogy for my color and fabric choice for this application: Think of the lady who walks into an event greeted by debutantes dressed in elegant, classy black evening gowns. But she choose to live life in blooming color. She wore a bright pink chiffon dress with a feather boa around the hem and cheetah print high heels.

A few may adore her style, while other’s will border on finding her choice offensive. My chair is similar to her: bold, specific, unafraid, and unfettered by appropriateness.


Live Life Colorfully
I walk down the stairs almost every single day to see this light filled living room with bright colors, and I’m instantly happy! Tom the Great loves when I’m happy! (He doesn’t want me near his office with my lacquer spray paint, mind you. But, he is 100% behind my flirtatious dance with décor in the living room.)

Of course, it’s all the better when THE CHAMP is there to greet me!

If you’ve not used lacquer spray paint, I suggest a practice run on an item that would not cause grief and pain should you be somewhat of a perfectionist, as there is a definite learning curve. Now, fellow DIYers, it’s your turn to dance!
Enjoy Today!
Love y’all,
Lori Nell

You can shop my home decor and similar home decor items below: Just tap the bottom of the image:

Never miss a Post. Sign up in the box below for an e-mail the instant I add a new post.
Visit me on my Pinterest and Facebook accounts for more inspiration.

Lou Ann
Southern Nell Gracious Living
Jennifer
Southern Nell Gracious Living
Tara @ Stilettos and Shiplap
Southern Nell Gracious Living
Chloe Crabtree
Southern Nell Gracious Living
Rschelle
Southern Nell Gracious Living
Loren
Southern Nell Gracious Living
Meegan
Pingback: Chinoiserie Inspired Room Makeover - Southern Nell
Pingback: Spring Decor Ideas for the Southern Chinoiserie Home
Pingback: Chinoiserie Master Bedroom Makeover - The Furniture - Southern Nell's
Pingback: Budget Friendly DIY Makeover - Brass and Marble Shelf - Southern Nell's
Pingback: DIY - Designer Lamp Makeover - Southern Nell's
Pingback: How to Get a High Gloss Finish on Wood Furniture - Southern Nell's
Pingback: How to Lacquer Furniture: A Comprehensive Guide - House and Home Online