This post contains detail on the Chinoiserie Master Bedroom Makeover – The Reveal Episode.
Don’t say it! Don’t say it! Don’t. Say. It…….
….I REALLY don’t know where to start!
Oh well, I. Said It.
So trite, but so true. WHAT A MARATHON OF LIFE & LEARNING we have experienced in this past 8 weeks. I will forever cling to the good and strive to release the dark and ugly within myself, as we are required only to: Do Justly–Love Mercy–and Walk Humbly with our God.
The silence of social media during Week 5 for listening and learning. Finding black voices and talents in the blogging world was a bonus. I discovered SO MUCH LOVE and SO MUCH TALENT. I’m thankful and look forward to listening and watching them daily.
AND then there’s ThE MaKEOveR! My family and I have worked together to create a Chinoiserie Master Bedroom Makeover that I will love for a very long time. To Tom the Great, and TtG Jr., and Annalisa the Beautiful–thank you so much for the physical work, the constant encouragement, second opinions, and back rubs.I love you all!
The History of a Chinoiserie Master Bedroom Makeover
The original Schedule of Work:
- Week 1 – May 8 – Introductions – It’s the Master Bedroom
- Week 2 – May 14 – Color Story
- Week 3 – May 21 – Walls & Ceiling
- Week 4 – May 28 – Furniture
- Week 5 – June 4 – Window Treatments & Lighting
- Week 6 – June 11 – Art
- Week 7 – June 18 – Decor
- Week 8 – June 25 – Final Reveal
Adjusted Schedule of Work:
Week 1 – May 8 – Introductions – It’s the Master BedroomWeek 2 – May 14 – Color StoryWeek 3 – May 21 – Walls & CeilingWeek 4 – May 28 – FurnitureWeek 5 – Pause for Black Lives MatterWeek 6 – June 11 – LightingWeek 7 – June 18 – Window Treatments– Wall Art- Week 8 – June 25 – Final Reveal
Don’t say it! Don’t say it! Don’t. Say. It…..
With no further ado, I give you…..
Oh well! I. Said. it. Once again with the cliche….
Chinoiserie Master Bedroom Makeover – The Reveal
Truly, I should call it the “ChinoSoutherie” Master Bedroom (my own blend of Chinoiserie and Old South), but that does NOT do well in SEO. It does, however, perfectly describe my home, and quite possibly no room in my home is a more perfect representation of the style than this master bedroom. Just look……


Remember Week One. That week was just an introduction to me and an announcement of which space I would be making over. It wasn’t until Week Two that I created the mood board with a few decor items I already owned, and a couple of inspirational photo clips from the internet (the dresser and the lamp–which has it’s own love story a few screens down). The entire space grew from this…

To be even more precise, as I explained in the week 2 post, the single inspiration piece is my green and aqua, cheetah print, Kate Spade throw pillows that have tucked away for at least two years!

That was the beginning and here is a tour 8 weeks later:
Areas of the Chinoiserie Master Bedroom Makeover
- The Entrance
- Bed
- Flooring
- Sitting Area
- The Ceiling and Walls & Lighting
- Furniture Details
- The Lamps and THE LAMP
- Art and Decor
Chinoiserie Master Bedroom Makeover – The Entrance
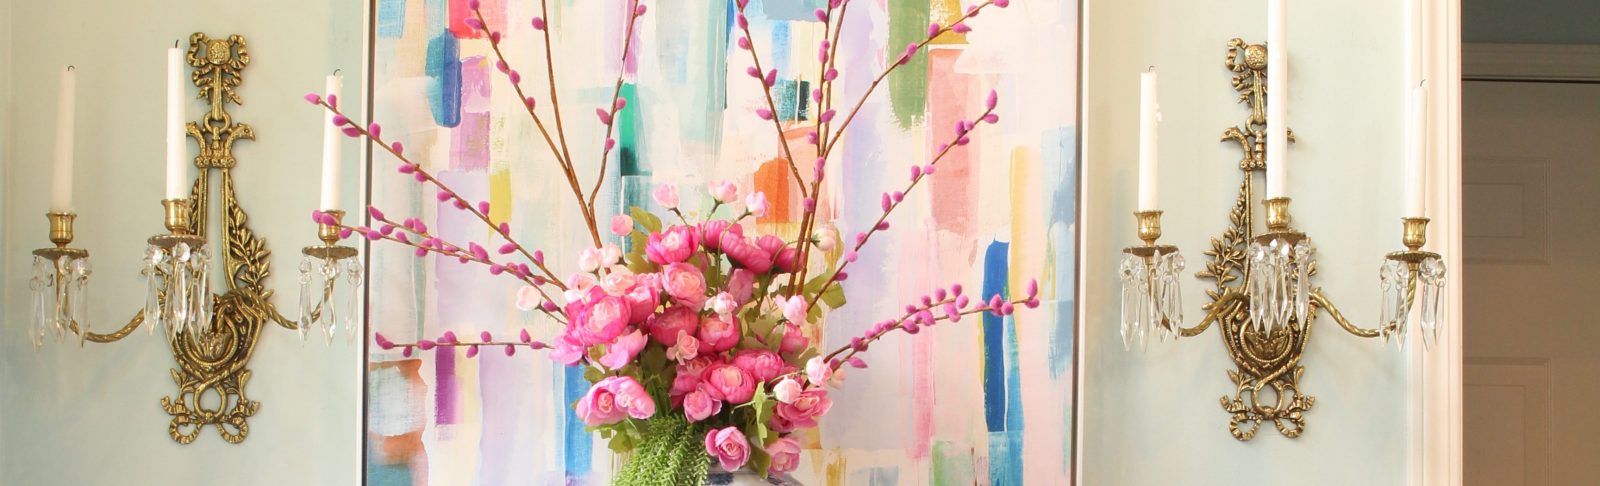
This Master Bedroom has a small entry area. I painted some candles and relocated one of my favorite crystal dripping scounces to welcome us into the room.

The addition of a pair of George Jones and Sons snack plates from the early 1900s to flank the top and bottom filled the space perfectly. I’ve these stashed away a couple of years as well. The color grabbed my attention. These are the only two pieces of the Rhapsody set that I own, and thought this was a great way to display them.

Chinoiserie Master Bedroom Makeover – The Bed
Here’s the scoop, this headboard was created a few years back by combining two twin size headboards. Maybe it’s been done before, I don’t know. Later, I will dedicate a post to walk through that process. For now, here’s how they looked before, in the French Master Bedroom.

The French Bedroom was enjoyed for several years, but we were ready for an update. Quite a dramatic one, I think.

Bed Coverings and Pillows
The bedding exemplifies “Chinosoutherie”. Yes, there are pairs of pillows, but other than that everything is a mix match. Including the mischievous subject on a needlepoint pillow, and a Euro Pillow made from a fabric remnant I found two years ago at an antique mall, and sewn under the watchful eye of my Mom last summer.

The King-size velvet shams are part of a set that includes the bedspread that is folded across the bottom of the bed. For the warmer months, I will use it in it’s intended form, but I love using white in the summer.

So, I have a pristine white cotton Peacock Alley coverlet layered on the bed. The vintage crochet pillow cases and top sheet I found several years ago in my little hometown in Tennessee on the “square”. If you’ve ever been to a quaint southern town, you know “the square” is a circle in the middle of the town with boutiques, diners, and if your lucky lots of antique shops like the one where I found this sweet set. In my mind, this was hand crocheted by one of the residents there and is a piece of my history. If your wondering, I remove those pillows and that top sheet that is just folded and placed on the bed like a scarf each morning.


The Flooring
Our neutral carpet was replaced not that long ago and is in great shape, so it remains. I did purchase a large area rug under the foot of the bed. I had to compromise with Tom the Great on the size. I wanted a super large, go all the way to the nightstands, and cover most of the area rug, and he wanted a small runner. I do love how the the layering adds a cozy feel and a cohesiveness to the room, and the colors are incredible.


Chinoiserie Master Bedroom Makeover – The Sitting Area
Before this makeover, I thought this huge sitting area would have served us better as a closet. Not now! This maybe my favorite space in the room.

Each of the furniture pieces, except for the desk chair, I already owned and will go into more detail later in the post. The feature in this area is a bay window. I painted the alcove in the same color I used on the tray ceiling. You can see more of that on the Week Six post. Early in the process I planned to place the drapes on the soffit and have them meet the drapes in the adjacent corner window. I even ordered the hardware for that installation. I changed my mind at the last minute, and I’m happy with the results.

I’m debating whether or not to install blinds. I actually love opening the drapes each morning!! It just feels so fancy. (By the way I have a plan for the other hardware so be sure to subscribe to the blog to get an e-mail when I have a new post!)
(You can read about the drapes in the Week 7 post.)
Chinoiserie Master Bedroom – The Ceiling and Walls
An early decision for the room was to add wallpaper to the feature wall. Finding the vintage Schumacher wallpaper in a favorite antique mall was one of the thrills of the eight week makeover. You can read all about the wallpaper and accent paint color in my Week Four post. This view, shot while I was flat on my back on the floor, shows the color of the wallpaper and paint together. I’m so pleased.

As I mentioned in Week Four post, I designed a feature for the tray ceiling. Featuring the 5th wall is a favorite trick of mine. BHG – ORC 2019 Fall shows how I feature the ceiling in my guest bathroom makeover–DIY-Small Bathroom Makeover – The Reveal.

For the tray ceiling in this space, I used stock molding to build a frame around my prized (and as I mention in Week Six--quite famous–haha) chandelier. Not to pick favorite features, but this is certainly in my top 3 of the room. Check back often as I intend to write a how to blog on this project.

My best efforts for photographing the ceiling fall short. Here, I’m lying on my back, unable to use my tripod for a steady hand. Oh, well, you can get the idea, and I can get a pro to do these shots for the How To post!

The same stock molding and paint were used in the bay window area. We contemplated how much trim to add to the bay window, deciding to keep it on the ceiling, only. You could, however, frame out the entire window area for a great look as well. This might happen in this space after a couple weeks of rest.


Chinoiserie Master Bedroom – The Furniture
Every piece of furniture in this space is vintage. I know that renewable resources are in vogue again, and that’s great. Not everyone has the time or inclination to hunt down vintage pieces that are still in great shape, so there is the option of buying it new. I have sourced this look for you, so be sure to check out the SHOP MY HOME tab.
The Nightstands
I’ve already told you about the headboard, so let’s take a look at these Henry Link night tables and mirrors. Here’s how they looked when I found them.

Not bad at all. The frames of most of these 1960’s faux bamboo furniture pieces are solid. They got a tedious coat of high gloss, and I am over the moon in love.

The hardware had been painted at some point. I soaked them in vinegar and used a scrub brush to remove the paint. They are back to their original beautiful gold.

We love the color and the sleek finish.


The Settee
The settee was a happy find. I knew that I would use some wicker or rattan or bamboo in the room, but I hadn’t planned on a settee for the foot of the bed. It found me at a consignment shop when I was looking for Henry Link faux bamboo nightstands! The pillows are simply King Size pillows inside the king pillowcases that match my sheets. I looked for a long time for a simple tufted white cushion and couldn’t find it, and this was my solution. It works for now. The back pillows are my sleeping pillows. When I make the bed with my vintage crochet pillow cases, I have a great spot to put my sleeping pillows. Win. Win.

The neck roll pillows were some I made last summer for the dining room chairs. We didn’t like them there, but love them here! I added a touch of the same vintage material from the Euro pillow on the bed to them.

The fun cocktail table in front of the settee was a Mother’s Day gift from my son. The bamboo legs were in great shape, but the top needed some help. I put a coat of the same high gloss green that I used on the headboards. Love , love the little piece and the opportunity it creates to display my pretties.

The Chaise Lounge
Some of you are going to wonder why in the world I painted this vintage fainting couch! Here is the before in my French Bedroom.

Before you shoot me, although it’s a wonderful piece of vintage furniture it is not an antique. To paint an antique is to devalue it. Sometimes painting a vintage piece increases the value. This is definitely the case for my chaise lounge. Especially since the value is in my eye, and the piece will remain in my home. See how that works? I love the transformation.

The caning got a light sanding and then a single coat of stain, just like the headboards. The wood got a full Southern Nell color treatment. This is the same high gloss paint I used on the nightstands. Although I planned on sewing a new cushion cover out of that same vintage fabric, I loved how the original velvet looked so I kept it. I simply added a petite fringe trim to the piping for a fun update.( The side tables and French Aubusson Petit Point pillow remain as well.)

The Desk and Dresser
A dressing table is a necessity for a southern lady. I sold my beautiful French dressing table knowing I would need to come up with a solution (at least if covid-19 ever goes away), for daily primping. This vintage rattan and wicker desk was being used as a sofa table in the family room. It fits the bill perfectly. My makeup is all organized inside the drawers where once lived very important papers I’m sure. I’m on the hunt for a fabulous vintage gold mirror.

It’s time for some brutal honesty. You see that desk chair I tried to make work for the dressing table. I don’t like it. It’s the only thing in the room that has fallen woefully short. It wasn’t inexpensive either. Oh well. Something else to keep me in the hunt. But, the dresser. I LOVE the dresser.

My son was graciously listening as I told him about a dresser I wanted for the space, but waiting too long and it sold. He was encouraging as usual, assuring me I’d find the perfect one. He left for work, and no less than two minutes later, this SOLID Rattan and Wicker 1970’s Dixie dresser popped up on my Facebook Marketplace! Perfect and a reasonably priced! (A side bonus was meeting the nicest couple.)

The Lamps and THE LAMP
There are lots of opportunities for lamps in this room. With a little restraint, I stopped with four. The blown-glass bedside lamps were the perfect size for the nightstands. The color is fabulous in person. I changed out the plain white round shade for this off-white rectangle-shaped woven shade and ran a piece of black trim around the bottom edge to tie in the black artwork above the bed.

The vintage brass and marble floor lamp was perfect for the large picture window.

We happen to be repainting the outside of our home, replacing some wood rot and several windows. Look closely and you will see the trim work that has been scraped and readied for the new paint ( hahaha). Otherwise, a pretty cool photograph, I think.

AND then there’s THE LAMP! The fabulous Atlanta area design team of Parker Kennedy Living gifted me with this amazing hollywood regency lamp. It is the exact lamp I had copied from a Pinterest post and added to my mood board!!
The Lamp

It is so amazing. I’m forever thankful for David and Lance and their support of this little Instagram friend! If you love my style, you will devour their collection on PKLCELLAR. Every room they’ve created will be your new favorite. This is my new favorite lamp!

Art and Decor
The final and perhaps most fun reveal is the art and decor. Restraint is next to impossible for me, when it comes to what I call “the fluff” of a room. But, I did my best in this space. For the most part, I already owned the decor and art work. I purchased a couple of “new” vintage items. First up, this three dimensional mother of pearl Asian art piece. I wanted a strong piece to be the focal of the feature wall, and these ladies do the job.


These vintage doves were another purchase. They were from Parker Kennedy Living’s antique and vintage online store, PKLCELLAR. I adore the soft colors. They perfectly mimic the colors in my vintage fabric found on both the Euro pillow and on the neck rolls.

The other decor purchase was, shall we say, non-traditional. It’s a 1970s necklace and earrings set from The Philippines. To me it is perfect in the room, if slightly eccentric.

My daughter contributed this beautiful Asian gown.

Here are a few pieces that I already owned and worked beautifully in the room.


A pair of my beloved antique french mirrors remained in the room. I actually parted ways with over 1/2 my antique mirror collection. They funded a good portion of the makeover! They have traveled from the master bedroom to the large wall in the entry way and back to the master. My dear friend Pam, you can view her home here, found the larger one pictured in Minnesota!

The Woman Wall
The “woman wall” was inspired by the picture I first used in the fall ORC, The Guest Bathroom.

One of my very humorous followers asked, tongue in cheek, if that was me in the artwork. A seed was planted, and this “Woman Wall” was born.

You can find a fashionable, young Southern Nell on the wall, and two photographs of Annalisa the Beautiful. Maybe this is my favorite wall in the room?!


There you have the blood, sweat and tears of an eight week transformation!
Thank you, again, for all the support and well wishes this past eight weeks. I hope you are inspired and encouraged to tackle a small (or big) job in your home.
You can also SHOP MY HOME. I update the links regularly. Although I do incorporate a fair share of vintage in my home, I try to find similar items for you. Any brand new items I’ve used are linked (if not sold out). If you have any questions I’ve not answered, don’t hesitate to reach out!
Thank you again, Better Homes and Garden One Room Challenge team. Be sure to use This Link to check out the talented designers this year. I plan on spending even more time browsing after posting my reveal. I’m not going to steer you to my favorites on this last post, you go searching to find your own! You will not be disappointed.


Enjoy Today!
Love y’all (truly mean it),
Lori Nell
Never Miss a Post – Sign Up Below
Be Sure To Follow Me on Your Favorite Social Media Platform Below

Linda Strode
Southern Nell Gracious Living
Lydia
Southern Nell Gracious Living
acraftymix
Southern Nell Gracious Living
Sara
Southern Nell Gracious Living
Deana Landers
Southern Nell Gracious Living
Jenna Pilant of Room Bloom Design
Southern Nell Gracious Living
patch2410
Southern Nell Gracious Living
French Ethereal
Southern Nell Gracious Living
Pingback: Chinoiserie Master Bedroom Makeover - Southern Nell
Pingback: Chinoiserie Master Bedroom-Paint and Wallpaper - Southern Nell
Pingback: Chinoiserie Master Bedroom Makeover - The Furniture - Southern Nell
acraftymix
Southern Nell Gracious Living
kathryn richmond
Southern Nell Gracious Living
Pingback: Update a Built in Bookcase with Foam Board - Southern Nell's
Pingback: DIY - Small Bathroom Makeover - The Reveal - Southern Nell's
Pingback: Elegant White Kitchen Makeover with a Splash of Chinoiserie - Southern Nell's
Pingback: Grandmillennial and Chinoiserie Chic Design Styles - Southern Nell's